Choosing the right SDS Plus Hammer Drill Bit can make a noticeable difference in speed, accuracy, and tool wear. The right choice depends on the material, hole size, drilling depth, and your rotary hammer’s specifications. A bit suited to concrete may perform poorly in brick or stone. Fit matters, too. SDS Plus shanks are designed for compatible rotary hammers, not ordinary drill chucks.
There is no single best bit. That sounds obvious, but it is easy to focus only on price or diameter. Check the bit’s length, carbide tip, flute design, and stated material range before buying. For example, a long bit may reach through a thick wall, but it can feel less manageable in a shallow hole. Match the bit to the job, and follow the tool manufacturer’s guidance. Small details matter.
This guide explains how to compare bit types, sizes, and construction features for common drilling tasks. It also covers signs of wear, practical handling considerations, and how to avoid mismatched equipment. No bit lasts forever. If drilling becomes slower, the hole looks rough, or the bit overheats, pause and inspect it rather than forcing the cut. A careful selection will not solve every problem, but it can help produce cleaner holes and more consistent results.
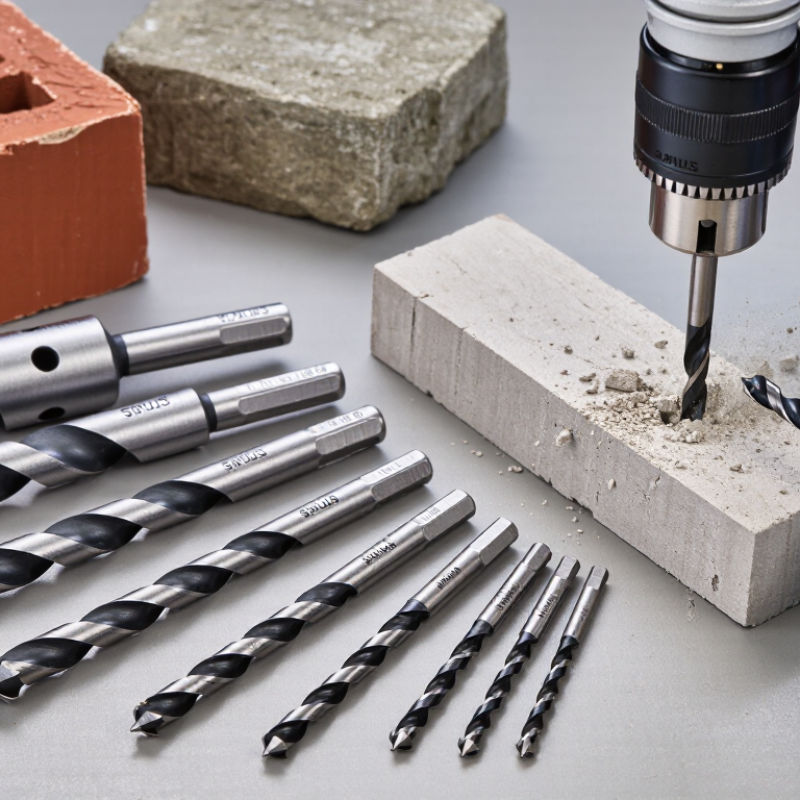
Understand the SDS Plus System and Its Intended Uses
The SDS Plus system describes a shank-and-chuck connection, not a particular drilling task. Its slotted steel shank fits a matching hammer-drill chuck, where locking balls hold the bit while allowing slight axial movement. That movement helps transfer hammering force into masonry. The bit must match the tool’s SDS Plus chuck; a similar-looking shank is not enough. That matters.
SDS Plus bits are commonly used for holes in concrete, brick, and block. Choose a diameter and working length suited to the anchor or fixing, and check the tool’s capacity before drilling. A long bit can reach deeper, but it may wander more easily. For tile or delicate masonry, use a suitable method and light pressure to reduce chipping. Don’t force the bit.
Look at the tip as well as the shank. A carbide-tipped masonry bit suits ordinary concrete and brick, while specialized head designs may help with tougher materials. If you encounter steel reinforcement, stop rather than pushing harder; the bit may be damaged, and the hole may shift off line. Check the fit. Insert the shank until it locks, then give it a gentle pull before use. Keep the bit straight, clear dust when practical, and let the hammer action work. It is tempting to judge a bit by speed alone, but clean alignment and a secure fit often matter more.
How to Choose the Right SDS Plus Hammer Drill Bit? — Understand the SDS Plus System and Its Intended Uses
| Selection Factor | What to Check | Practical Guidance | Typical Application |
|---|---|---|---|
| Tool and shank compatibility | SDS Plus chuck and bit shank | SDS Plus bits have a nominal 10 mm shank with four drive and retention grooves. Confirm that the tool has an SDS Plus chuck; an SDS Max or ordinary three-jaw chuck is a different interface. | Rotary hammer drilling in concrete, brick, and masonry |
| Bit tip | Carbide-tipped masonry head | Choose a carbide-tipped bit for ordinary masonry drilling. A two-cutter head is suitable for many general tasks; a multi-cutter head may help with demanding reinforced-concrete applications when permitted by the tool and bit instructions. | Anchor holes, fixings, and general concrete drilling |
| Bit diameter | Required hole diameter and fixing specification | Match the bit diameter to the anchor or fixing instructions. Common SDS Plus sizes include approximately 5–16 mm, but availability and usable range vary by tool and bit. | Small holes for plugs through to larger fixing holes |
| Working length | Required drilling depth, excluding the shank | Select a working length that reaches the required depth without using an unnecessarily long bit. Longer bits can flex more and may be harder to control. | Deep fixing holes or access through thicker masonry |
| Overall length | Bit length including its shank | Check overall length against available clearance and the hammer drill’s capacity. Overall length and working length are not interchangeable measurements. | Choosing a bit that fits the workspace and tool |
| Material being drilled | Concrete, brick, block, or stone | Use a bit specified for the material. For brittle tile or delicate finishes, use an appropriate non-hammer method until the bit has passed through the fragile surface, where suitable. | Masonry work with material-appropriate drilling technique |
| Drilling mode | Rotation-only or rotary-hammer setting | Use rotary-hammer action for suitable masonry. Use rotation-only when the material or bit instructions require it. Do not use hammer action on materials that may crack or on bits not rated for impact. | Adapting the drilling action to the material and bit |
| Reinforcement and obstructions | Possible rebar, cables, pipes, or other concealed services | Check the work area before drilling. Do not force the bit through reinforcement; stop and follow the project, tool, and bit guidance if the bit strikes metal or an obstruction. | Safer drilling in structural or finished surfaces |
| Dust and hole cleaning | Dust extraction and fixing requirements | Use suitable dust control and clean the hole as required by the anchor or fixing instructions. Dust left in a hole can affect the installation of some fixings. | Anchor installation and cleaner job-site drilling |
| When not to use an SDS Plus masonry bit | Wood, metal, and tasks requiring a different bit geometry | An SDS Plus shank alone does not make a bit suitable for every material. Use a bit designed for wood or metal, with a compatible chuck or approved adapter and the correct operating mode. | Material-specific drilling outside ordinary masonry work |
Quick check: Match the shank to the tool, the diameter and length to the hole, and the bit type and operating mode to the material. Always follow the tool, bit, and fixing instructions.
FAQS
Choose a carbide-tipped masonry bit suited to the concrete and aggregate. Check the drill’s stated capacity before selecting its diameter.
Usually, but softer brick can crumble under heavy pressure. Test a hidden spot and use steady, light pressure.
Use a tile-rated bit for the glazed surface, with hammer action off. Switch to a masonry bit after reaching the material behind it. Tile can crack.
Match the working length to the hole depth and required anchor embedment. Leave room for dust at the bottom; a shorter bit is easier to control for shallow holes.
No. The drill must have a matching SDS Plus chuck, and the bit’s diameter must be within its stated capacity. A standard round shank is different.
Look for a chipped tip, bent shank, rust, or clogged flutes. I sometimes skip this when rushed, and that is worth reconsidering.
Unplug the drill, clean dust from the shank, and insert the bit fully. Give it a gentle tug to check that it has locked.
Stop and check for a worn tip or hidden reinforcement. More force may strain the tool. Wear eye protection and clear dust as directed.
Conclusion
Choosing the right SDS Plus Hammer Drill Bit begins with understanding the SDS Plus system and the type of hammer drill it is designed to fit. Consider the material you will drill—such as concrete, masonry, or another suitable surface—and the task’s requirements, including the hole’s purpose and expected depth. These details help narrow down the bit’s design and prevent choosing one that is unsuitable for the work.
Next, match the bit’s diameter and length to the hole you need, then consider the tip and flute design for effective cutting and debris removal. Before drilling, verify that the bit is compatible with your tool and inspect it for wear, damage, or a dull tip. A suitable, well-maintained SDS Plus Hammer Drill Bit can support more controlled drilling and help you complete the job efficiently.